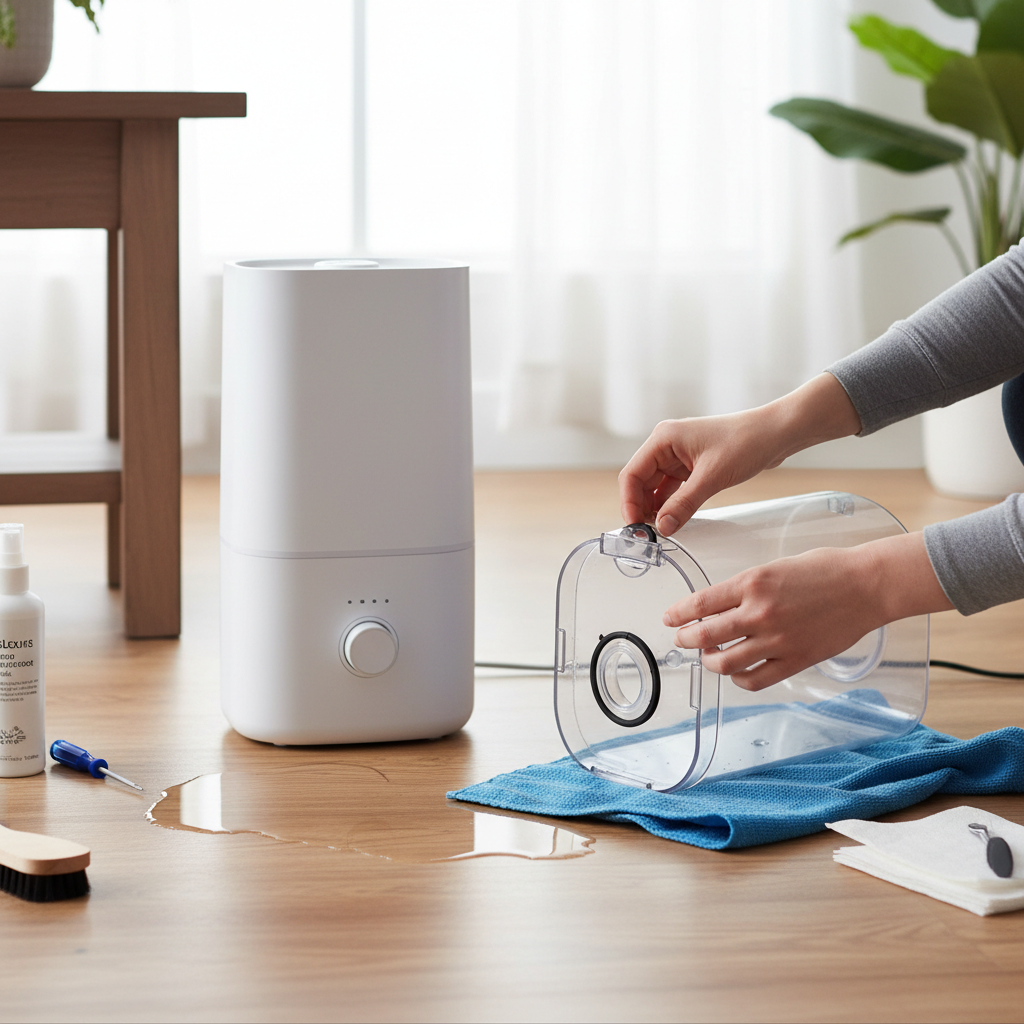
Waking up to a damp spot or a growing puddle around your humidifier can quickly turn a beneficial appliance into a frustrating mess. A leaking humidifier doesn’t just create inconvenience; it can damage your floors and furniture, and in some cases, even pose electrical hazards. Often, the culprit is a compromised tank seal, a common issue that many homeowners can tackle with a bit of know-how and the right approach. This comprehensive guide will walk you through diagnosing, repairing, and preventing leaks originating from your humidifier’s tank seal, ensuring your home remains comfortably humidified without the unwelcome puddles.
Understanding Your Humidifier: Why It Leaks and How It Helps
Before diving into repairs, it’s helpful to understand what a humidifier does and why its seals are so critical. A humidifier adds moisture to the air, which can be invaluable for your health and home. It alleviates dry skin, soothes sore throats, reduces static electricity, and can even protect wooden furniture and musical instruments from drying out and cracking.
Humidifiers come in several common types, each working slightly differently but all relying on a water tank or reservoir to hold the water.
- Evaporative Humidifiers: These use a fan to blow air over a saturated wick filter, naturally evaporating water into the air. Leaks often stem from the reservoir or the base where the tank sits.
- Ultrasonic Humidifiers: These employ a rapidly vibrating metal diaphragm to create a cool mist. The tank seal is a critical component to prevent water from escaping as the diaphragm vibrates.
- Steam Vaporizers: These heat water to produce sterile steam. Due to the high temperatures, the integrity of all seals, including the tank, is paramount for safety and function.
- Impeller Humidifiers: These use a rotating disc to fling water against a diffuser, breaking it into a fine mist. While less common, tank seal issues can still arise if the reservoir is not properly sealed.
Regardless of the type, a watertight seal between the water tank and the base unit is essential. When this seal fails, water finds an escape route, leading to leaks.
Common Humidifier Leaks and Their Telltale Signs
A leak isn’t always from the tank seal, though it’s a frequent suspect. Identifying the exact source is the first step towards a successful repair. Here are common reasons your humidifier might be leaking:
- Worn or Damaged Tank Seal/Gasket: Over time, the rubber or silicone seal (gasket) that creates a watertight connection between the tank and the base can dry out, crack, become flattened, or shift out of place. This is a primary cause of leaks.
- Cracked Water Tank: Accidental drops, impacts, or even age and frequent cleaning (especially with harsh chemicals or hot water) can lead to hairline cracks in the plastic tank itself.
- Improper Tank Seating: If the water tank isn’t correctly aligned or fully seated onto the base, the internal valve may not seal properly, allowing water to continuously flow or spill.
- Overfilled Water Tank: Filling the tank past the “max” line can cause water to overflow during operation or if the unit is slightly tilted.
- Mineral Buildup: Hard water deposits can accumulate around valves, sensors, or drainage channels, preventing proper sealing or causing blockages that lead to overflow.
- Uneven Surface: Operating the humidifier on an unlevel surface can cause water to pool and spill from one side, or interfere with internal water level sensors.
- Clogged Drainage Hole/Tray (Less common for tank seal, but related): In some models, a clogged drainage system can cause water to back up and spill over.
Quick Guide to Common Humidifier Leak Symptoms
|
Our Picks for the Best Humidifier in 2026
As an Amazon Associate I earn from qualifying purchases.
|
||
| Num | Product | Action |
|---|---|---|
| 1 | BOXING 3L Cool Mist Humidifiers, Ultra Quiet 20dB for Bedroom, Baby & Office, Top Fill Air Humidifier for Large Room Home & Indoor Plants, 30H Runtime, Essential Oil Tray, Night Light, BPA-Free, White |

|
| 2 | Homvana Humidifiers for Bedroom Home, 3.6 L Cool Mist Top-Fill 34H Super Long Time, Quiet 23dB, Baby Humidifier, Oil Diffuser for Large Room, House, Plant, Nursery, Office, BPA FREE, Ultrasonic (Grey) |
|
| 3 | MegaWise Topfill 7-colour Night light humidifier for Kid bedroom with 3.5L Large Capacity, No leakage Design Fine Mist Output Auto Shutoff, Essential Oil Safe Tank |
|
| 4 | BREEZOME 6L Humidifiers for Bedroom Large Room & Essential Oil Diffuser, Ultrasonic Top Fill Cool Mist Humidifiers for Baby, Plants, Nursery Last up to 60 Hours, Smart Humidistat Control, Quiet, Black |
|
| 5 | LEVOIT Top Fill Humidifiers for Bedroom, 2.5L Tank for Large Room, Easy to Fill & Clean, 28dB Quiet Cool Mist Air Humidifier for Home Baby Nursery & Plants, Auto Shut-off for Safety, 25H |
|
| 6 | Dreo Humidifiers for Bedroom, 4L Top Fill for Large Room, 36H Runtime, 28 dB Quiet Supersized Cool Mist Air Humidifier for Baby Nursery, Plants, Indoor, Night Light, Easy to Clean & Fill, White |
|
| 7 | Humidifiers for Bedroom Large Room with 7L/1.85Gal Large Humidifier, Smart App & Remote Control, 4 Mist Levels Large Room Humidifiers for Home Midnight |
|
| 8 | LEVOIT Humidifiers for Bedroom Large Room Home, (6L) Cool Mist Top Fill Essential Oil Diffuser for Baby & Plants, Smart App & Voice Control, Rapid Humidification & Auto Mode - Quiet Sleep Mode, Gray |
|
| 9 | LEVOIT - Humidifiers for Bedroom - Quiet (3L Water Tank) - Cool Mist/Top Fill/Essential Oil Diffuser/25Watt - Home/Large Room - 360° Nozzle - Rapid Ultrasonic Humidification for Baby Nursery/Plant |
|
| 10 | Dreo Smart Humidifiers for Bedroom, Top Fill 4L Supersized Humidifier Large Room with 28 dB, 36H Runtime, Touch/APP/Voice Control, Nightlight, Cool Mist Humidifiers for Baby, Plants, Indoor, Black |
|
| Leak Type | Symptoms | Initial Check |
|---|---|---|
| Worn Tank Seal | Slow, steady drip directly where tank meets base; appears over time. | Inspect rubber gasket for cracks, flatness, or displacement. |
| Cracked Tank | Constant drip, often from a specific spot on the tank body. | Hold empty tank to light, look for hairline cracks, especially near seams. |
| Improper Seating | Leak appears immediately after refilling/repositioning tank. | Remove and reseat tank carefully, ensuring it clicks/sits flush. |
| Overfilled Tank | Leak starts soon after startup, especially if moved. | Check water level against “max” line. |
| Mineral Buildup | Slow leak, often accompanied by white dust or scale. | Examine seals, valves, and base for chalky deposits. |
| Uneven Surface | Leak appears from one side; unit may wobble. | Place unit on a flat, level, waterproof surface. |
Troubleshooting a Leaking Humidifier: Pinpointing the Source
Before you can fix the leak, you need to be sure where it’s coming from. Follow these diagnostic steps:
- Safety First: Always unplug your humidifier immediately and drain any remaining water from the tank and base. Water and electricity are a dangerous combination.
- Visual Inspection (Tank): Hold the empty water tank up to a bright light. Look meticulously for any hairline cracks, especially around the base or neck where it connects to the unit. Even tiny fractures can be responsible for leaks. If you find a crack, replacing the tank is usually the safest and most effective solution.
- Inspect the Seal: Remove the water tank from the base. Carefully examine the rubber or silicone seal (gasket) located where the tank connects to the base, or on the tank’s cap. Check if it’s brittle, hardened, flattened, torn, or if there’s any debris, mold, or mineral buildup on it. A healthy seal should be pliable and intact.
- Check the Base Unit: Inspect the part of the humidifier base where the tank sits. Look for cracks, mineral buildup, or any obstructions in the water valve or drainage channels.
- Test the Water Valve (If applicable): Some tanks have a spring-loaded valve at the bottom. Gently press this valve to ensure it moves freely and seals properly when released. Mineral buildup can sometimes prevent it from closing fully.
- Reassemble with Care: Put the tank back onto the base slowly and deliberately. Ensure it clicks into place or sits flush. Avoid forcing it, as over-tightening can warp parts.
If, after this inspection, you’ve identified that the tank seal is the primary suspect – either it’s damaged, out of place, or covered in grime – you’re ready to proceed with the repair.
“Many assume a leak means a new humidifier, but often, it’s a simple fix like a worn gasket. A thorough visual inspection is your best diagnostic tool.” – Dr. Elena Petrova, Environmental Health Specialist
How to Fix a Leaking Humidifier Tank Seal: A Step-by-Step Repair Guide
Once you’ve confirmed the tank seal is the problem, here’s how to address it:
Preparation is Key
- Unplug and Empty: Reiterate that the humidifier must be unplugged and completely drained of water.
- Gather Your Tools: You’ll likely need:
- A clean cloth or paper towels.
- White vinegar (for cleaning mineral buildup).
- A soft brush or cotton swabs.
- Small flathead screwdriver or plastic pry tool (if the seal is recessed and hard to remove).
- Food-grade silicone grease (optional, for lubricating seals).
- A replacement seal/O-ring (if necessary).
Step-by-Step Repair
- Remove the Tank: Detach the water tank from the humidifier base.
- Locate and Remove the Seal: The seal or gasket is usually a rubber or silicone ring located either on the bottom of the tank (often around the fill cap or valve mechanism) or within the recess of the humidifier’s base where the tank rests. Carefully pry it out using your fingers or a non-abrasive tool if it’s stubborn.
- Inspect the Seal Closely:
- For Debris/Buildup: If the seal appears intact but dirty, mineral deposits or mold might be preventing a tight seal.
- For Damage: Look for any tears, cracks, permanent flattening, or signs of brittleness. If the seal has lost its elasticity or is visibly damaged, it needs to be replaced.
- Cleaning the Seal and Contact Surfaces:
- If the Seal is Intact: Soak the removed seal in a solution of equal parts white vinegar and warm water for at least 30 minutes to dissolve mineral buildup. Use a soft brush or cotton swab to scrub away any remaining residue. Clean the area on both the tank and the base where the seal makes contact, ensuring all surfaces are free of debris and scale. Rinse thoroughly and allow to dry completely.
- For Stubborn Buildup on Tank/Base: For heavier mineral deposits, you can apply a vinegar-soaked cloth or paper towel to the affected areas for a few hours before scrubbing clean.
- Repair Options:
- Re-seating and Lubrication (If Seal is Intact): Once clean and dry, carefully re-insert the seal into its groove. Ensure it sits perfectly flat and is not twisted or pinched. For added protection and to prolong the seal’s life, apply a thin layer of food-grade silicone grease to the seal before re-inserting it. This helps maintain flexibility and improve the watertight barrier.
- Replacing the Seal/Gasket (If Seal is Damaged): If your inspection revealed damage, replacement is the only reliable fix.
- Finding a Replacement: Check your humidifier’s manual for part numbers. Most manufacturers sell replacement seals directly. Third-party retailers, especially online, also offer compatible gaskets. Ensure you purchase a seal specifically designed for your humidifier’s make and model.
- Installation: Gently press the new seal into its designated groove on the tank or base. Make sure it’s fully seated and lies flat, without any bulges or twists. You can apply a thin coat of silicone grease to the new seal before installation.
- Reassembly and Test:
- Carefully place the water tank back onto the base, ensuring it’s properly aligned and seated. Listen for any clicks or feel for a secure fit.
- Fill the tank with water (do not overfill).
- Place the humidifier on a large towel or in a sink/tub.
- Plug in the unit and let it run for a while. Continuously monitor for any signs of leakage. If the leak persists, re-examine your work.
Preventative Maintenance: Keeping Your Humidifier Leak-Free
Preventing leaks is far easier than fixing them. Incorporate these habits into your humidifier routine:
- Regular Cleaning: Clean your humidifier weekly. This includes emptying the tank and base, wiping down all surfaces, and using a vinegar solution to descale. Pay special attention to the tank seal area to prevent mineral buildup and mold growth, which can degrade the seal.
- Use Distilled or Demineralized Water: Especially for ultrasonic humidifiers, using filtered or distilled water significantly reduces mineral deposits, extending the life of seals and preventing “white dust.”
- Don’t Overfill: Always adhere to the “max fill” line on your water tank. Overfilling puts unnecessary pressure on seals and increases the risk of spills.
- Proper Seating: After every refill or cleaning, take an extra moment to ensure the tank is perfectly seated onto the base.
- Level Surface: Always place your humidifier on a flat, level, and waterproof surface to prevent uneven water distribution and accidental spills.
- Periodic Seal Inspection: During your regular cleaning, make it a habit to inspect the tank seal for any signs of wear, hardening, or damage. Replace it proactively if it shows signs of deterioration.
- Empty for Storage: If you’re storing your humidifier for an extended period, completely empty and dry all components to prevent mold, mildew, and seal degradation.
When to Call a Professional or Consider Replacement
While many tank seal leaks are DIY-friendly, there are situations where professional help or replacement might be necessary:
- Persistent Leaks: If you’ve tried cleaning, re-seating, and even replacing the seal, but the leak continues, there might be a more complex internal issue or a crack you missed.
- Major Structural Damage: Extensive cracks in the tank or base that cannot be patched (e.g., using 100% silicone caulk for small, isolated cracks in plastic) mean the unit needs replacement.
- Age of the Unit: Like all appliances, humidifiers have a lifespan. If your unit is old and frequently experiencing issues, it might be more cost-effective to invest in a new one.
- Electrical Concerns: If you notice any burnt smells, sparking, or inconsistent power, discontinue use immediately and do not attempt to repair it yourself. Electrical issues require professional attention or replacement.
“While some minor cracks might be temporarily sealed with aquarium-safe silicone, for a compromised tank seal, replacement is almost always the most reliable long-term solution for optimal performance and safety.” – John Davis, Certified Appliance Technician
Frequently Asked Questions About Humidifier Leaks
Why is my humidifier leaking from the bottom even with a new seal?
If your humidifier is still leaking after replacing the seal, double-check that the new seal is installed correctly and not twisted. Also, inspect the tank for hairline cracks and ensure the tank is perfectly seated on a level base, as other issues like overfilling or clogged internal components can mimic a seal leak.
Can I use super glue or regular sealant to fix a leaking humidifier?
Using super glue or regular sealants is generally not recommended for humidifier repairs, especially for the tank seal. These products may not be food-safe, can degrade with constant water exposure, or may not provide the necessary flexibility for a watertight seal. Always opt for a compatible replacement seal or, if patching a crack, use 100% aquarium-safe silicone caulk.
How often should I clean my humidifier tank seal?
It’s recommended to clean your humidifier tank and its seal at least once a week with a vinegar solution to prevent mineral buildup and mold. Regular cleaning extends the seal’s life and helps ensure it maintains its integrity, preventing leaks.
What causes humidifier seals to wear out?
Humidifier seals wear out due to several factors, including mineral deposits from hard water which can cause them to harden and crack, frequent removal and re-installation which can lead to stretching or tearing, and general material degradation over time from continuous water exposure.
Is it safe to use a leaking humidifier?
No, it is generally not safe to use a leaking humidifier. Water and electricity are a dangerous combination, posing risks of electrical shock. Additionally, constant moisture can damage surrounding surfaces and encourage mold growth, which is detrimental to indoor air quality.
Conclusion
A leaking humidifier tank seal can be a nuisance, but it’s often a manageable problem with a clear solution. By systematically troubleshooting the issue, meticulously cleaning components, and either re-seating or replacing a compromised seal, you can restore your humidifier to optimal, leak-free operation. Remember that regular maintenance, including using appropriate water and consistent cleaning, is your best defense against future leaks. Don’t let a small puddle deter you from enjoying the benefits of healthy indoor humidity; empower yourself with the knowledge to keep your air moisturized and your home dry.
What other humidifier maintenance tips have you found most effective in keeping your unit running smoothly?